
In the previous post we gave a brief overview of the MitoMine™ language itself, in this post we will look at how one goes about actually running MitoMine™.
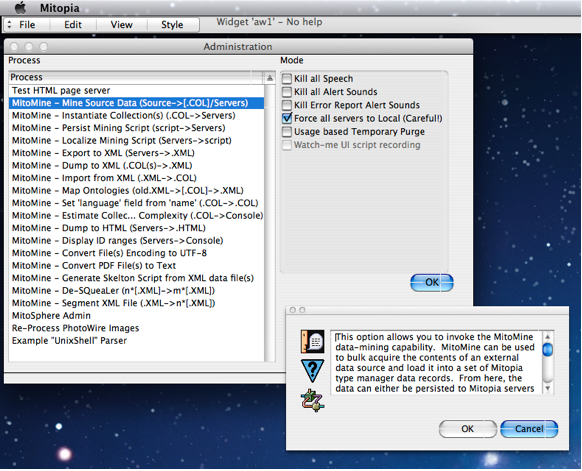
The most common way to run a MitoMine™ is to invoke the mining process in a client machine from within the Administration window (under View:Built in Views). MitoMine™ provides a wide variety of tools and utilities within the Administration window as shown in the screen shot to the right. The first entry for MitoMine™ (highlighted in the screen shot) is used to mine source data from a text file (or directory) on disk into one of more output collections that can either be saved to disk or persisted immediately to the system servers.
When the “Mine Source Data” tool is launched, the user is prompted to answer a series of questions in order to identify exactly what they want to do. The first question asks the “Maximum Number of records to extract?”. Normally one would click the “Unlimited” button which means extract all records found in the file or directory chosen. In certain cases, particularly when developing a mining script for a very large source, the user may wish to limit the number of records extracted in order to speed up the cycle of testing changes made to the script. To do this the user enters the count of the number of records to extract (a decimal number) into the alert dialog and then clicks “OK”. The mining run will terminate successfully after the specified number of records have been extracted into the ‘temporary’ collection. Note from our earlier discussions that due to the expansion of reference fields to other types within those records, the actual number of records (of all types) in the output collection when the process terminates may be far higher.
The next dialog that appears is a file picker dialog asking if the user wishes to select a “batch command file” in order to script MitoMine™ to perform a whole series of mining actions. When a user wishes to mine a whole variety of sources of multiple types, perhaps as part of initially loading or updating a Mitopia® system, it is convenient to use such a script so that a lengthy mining process can run unattended. Mining scripts also allow the mining process to be distributed and executed in parallel across all CPU cores in the local machine and for large batch mining sequences this can massively reduce the time required for the run. See the later section entitled “Batch Command Files” for more details. If mining a single source, a batch file is generally not required and the user should click the “Cancel” button to indicate that a batch file is not required.
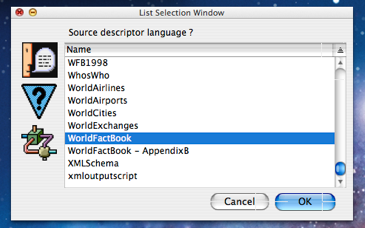 The user is next prompted with a list alert dialog asking which mining script to use to mine the source file(s) concerned (shown to the left). The content of this list is created by examining all mining scripts that are found in both the common and user/project specific MitoMine™ script directories. User/project specific scripts are displayed first in the list, then common (or system supplied) scripts. All Mitopia® systems come with a large number of system supplied example scripts included in order to serve as training references for users creating new scripts of their own. These can be found in the ‘common’ directory. As can be seen from the screen shot, in this case the user has chosen the “WorldFactBook” script since they intend to mine the content of the CIA World Fact Book as downloaded from the CIA web site. This source provides a good starting point for loading basic information about the world’s countries into a system.
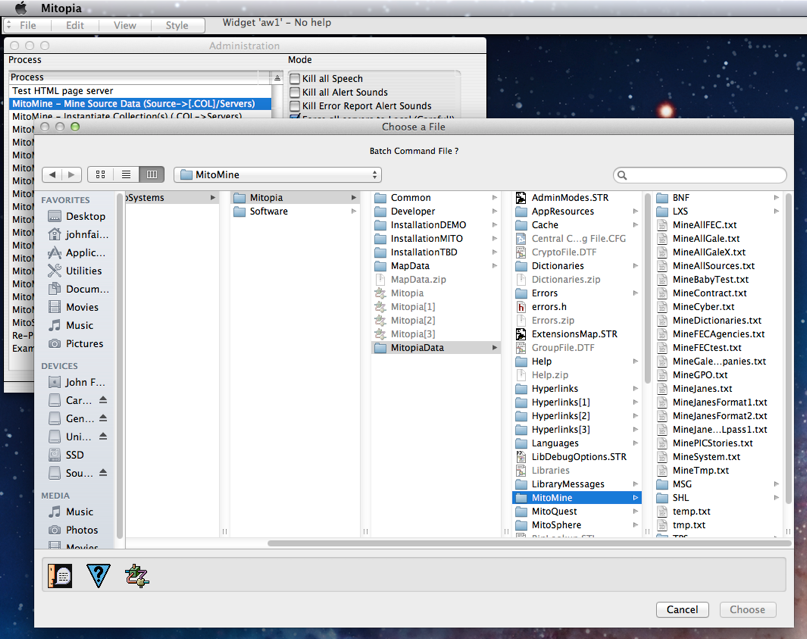
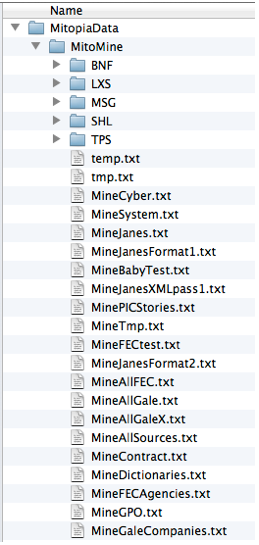 The location of the directory within which to look for ‘common’ scripts is given by the preference “Mitopia:CommonMineLanguages” which defaults to the sub-path “Mitopia:MitopiaData:MitoMine:” within the MitoSystems folder. Just as for the basic parser languages folder (preference “Mitopia:SysBNFFilePath” – see posts on the parser abstraction), within the folder designated by this preference we see sub-folders entitled “BNF” and “LXS” which contain the parser BNF and lexical analyzer specifications for each MitoMine™ script respectively. MitoMine™ is of course built on top of the Mitopia® parser abstraction as a heteromorphic language suite and so it follows all the basic parser conventions, but places its language definitions (referred to in a MitoMine™ context as ‘scripts’) into separate folders to avoid confusion. In addition to the “BNF” and “LXS” sub folders however, you will see sub folders named “MSG” and “TPS”. The “MSG” sub folder holds the optional ‘script/language’ descriptive message file that is displayed to the user during the alert sequence when running a mining script (see text below). The “TPS” file holds any optional additional type definitions over and above the current system ontology that are needed to run the script. Most scripts do not require a “.TPS” file, however it can be convenient during script/source development to place additional ontology type definitions in this file until such time as the script is fully working and the mined output is to be persisted, thus requiring an update to the ontology to add the new types at which point the “.TPS” file can be deleted. More details on these files are given in later posts. The “.txt” files shown in the screen shot to the right are actually batch command files for various data sets.
The location of the directory within which to look for ‘project/user’ specific scripts is given by the preference “Mitopia:MineLanguages” which defaults to the sub-path “:MitoMine:” within the project specific installation folder of the outer “Mitopia:” directory (within the MitoSystems folder). Each specialized Mitopia® project will have its own installation folder (e.g., the “InstallationDEMO”, “InstallationMITO”, etc. folders in the earlier file picker screen shot). The content of this directory is identical to that of the ‘common’ directory but for most projects/users it will contain substantially less mining scripts. For some projects this directory may be empty.
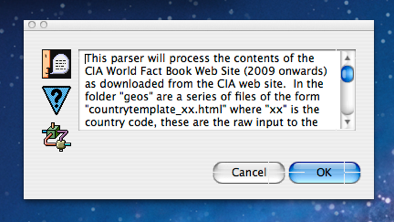 Having chosen an existing source descriptor language/mining script to use and clicked OK, if the script has an associated “.MSG” file, this description is then displayed to the user in order to inform them what the script does and any other important considerations relating to the script or source formats. The screen shot to the left shows this alert dialog for the WorldFactBook script. The content of the WorldFactBook.MSG file (on which the dialog is based) is as follows:

From this description we can see that the WorldFactBook script actually performs a pre-processing step if it encounters the raw “.html” files and saves the results of that step to the folder “_mitomine:countries” when it does so, in order to save time performing this step in subsequent runs. In order to take two passes on the source like this, the script utilizes the $GetSource and $PutAllSource MitoMine™ function to replace its own input file after running the preprocessing step. This powerful feature is described later in this document. This preprocessing step is not common for simpler mining scripts. For now we will simply choose the already pre-processed “_mitomine:countries” folder so we click the “Folder” button.
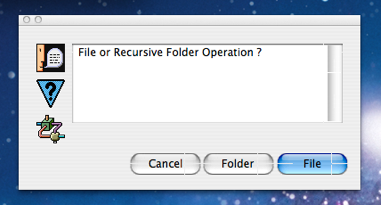
The user is next asked if they wish to process a single source file or an entire folder (screen shot to the right). In the case of the WFB source, this choice could take a number of values.
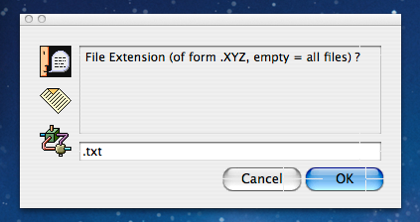
Clicking the “Folder” button results in the dialog shown to the left which gives the user the opportunity to filter which files within the folder picked are to be mined and which are to be ignored. If the user leaves the response value empty and clicks “OK” then MitoMine™ will attempt to scan every text file within the folder picked. In this case the preceding description dialog tells us that we should expect “.TXT” files within this preprocessed folder so we enter “.txt” (extensions are case insensitive in this context) into the dialog and click “OK”.
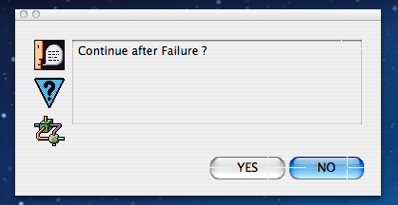 Next we are prompted to ask if we want the mining process to continue after detecting an error condition or not. The answer to this is almost always “NO” since if we have a serious error in our script, answering “YES” will most likely cause an avalanche of error reports. The exception to this rule is if we know that there are a very small number of errors occurring just within certain files or records within a file and we want to examine all of the errors in order to see if/how a recent fix made to the script to solve these error conditions has impacted the process.
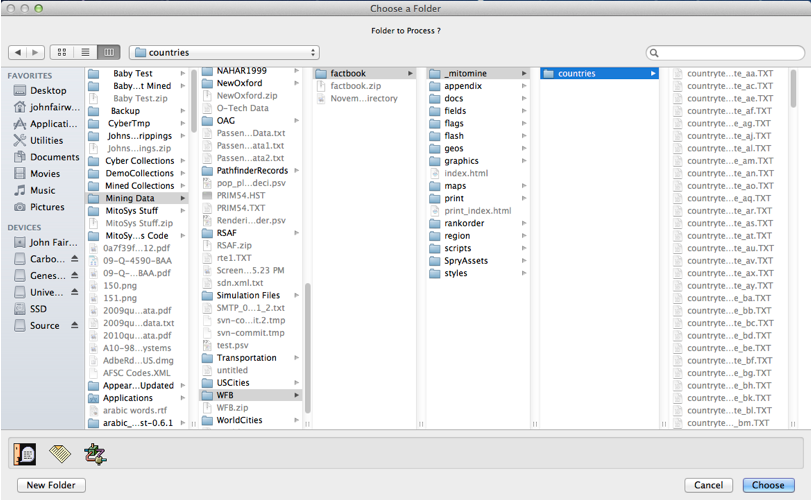
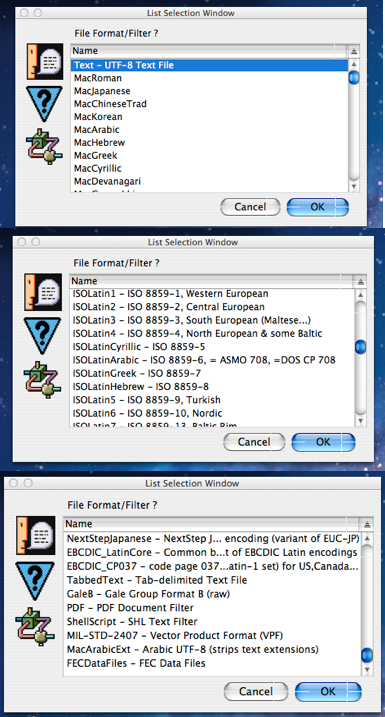 Next we are prompted for the file format/filter to be used on the source files in order to convert them to UTF-8 format before running the mining script on them. The three screen shots to the right show some of the huge number of possible filter formats that MitoMine™ supports. Most of these filters are involved in translating various other text encoding formats into UTF-8 since Mitopia™ holds all text in UTF-8 format so it is best to convert files encoded in other formats into UTF-8 prior to running the script against them. In most cases the source text file encoding will already be UTF-8 so the user should choose the first option in the list and click “OK”.
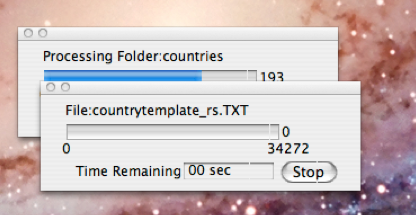
Some of the filters involve handling files having specialized formats (see third screen shot) in order to allow the script to handle non plain-text formats. These filters are registered by system code and the list can be extended to include additional options (see API discussions later). These formats can even include applying MitoMine™ to complex binary file formats, as for example the MIL-SD-2407 option shown in the final screen shot which is used to mine the content of binary Vector Format 0 map files into the ontology in order to create a detailed world map for use in the map visualizer. See later discussions on “File Filters and Text Fudgers” for more details.
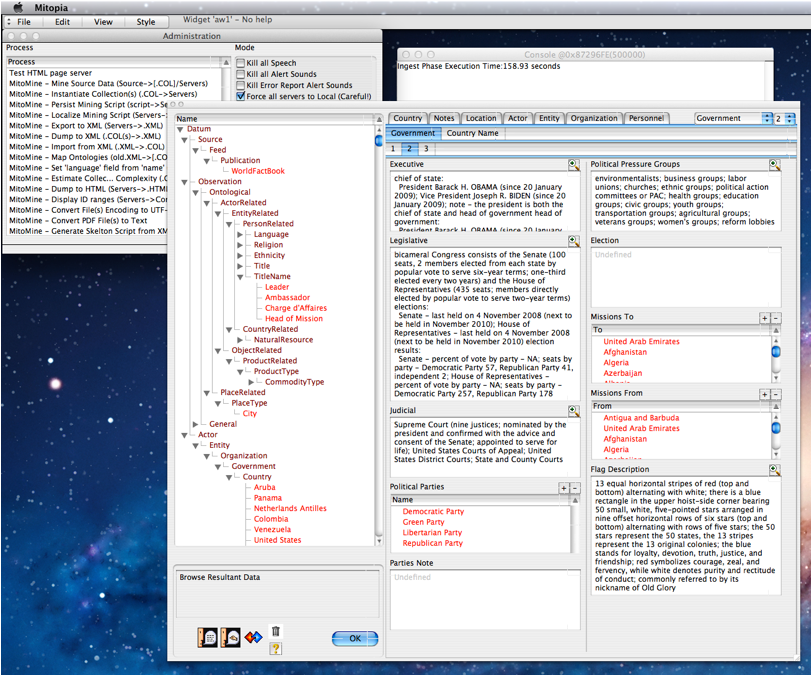
 In this case we choose “Text – UTF-8 Text File” and click the “OK” button. We are then presented with a folder picking dialog (or a file picker if we’d answered “File” instead of “Folder” to the earlier dialog. This dialog is shown in the screen shot above and the user has navigated to the required folder as instructed in the descriptive dialog for the source. On clicking “Choose”, the actual mining process begins and is accompanied by a progress bar showing how much time is estimated to remain before the entire folder (or file) contents have been processed. If any particular file within the folder take more than a few seconds to mine, a nested progress bar will be displayed showing progress within that file as illustrated in the screen shot to the right.
If any parsing error occurs during the run, the mining script will abort, and one or more errors are reported together with additional information both in the console window and in the Error Browser window to assist the user in determining the cause of the failure and correcting the script as necessary.
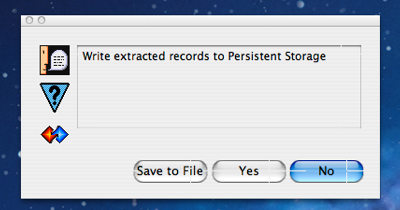 If the run completes without error, the total execution time is displayed in the console window (in this case 158.93 seconds) and user is presented with a collection alert dialog showing all the data extracted during the mining run as illustrated in the screen shot above. In the case of the WFB script it is clear that a wide variety of different and inter-related ontological types have been created. The user is free to navigate around the resultant collection in order to confirm that the extracted records appear to be correct and the script is working as intended. In the screen shot above the user is examining part of the record for the US. When done with browsing the mined collection, the user clicks the “OK” button which results in the alert dialog shown to the right asking if the user wants to persist the collection immediately or to save it to a file on disk.
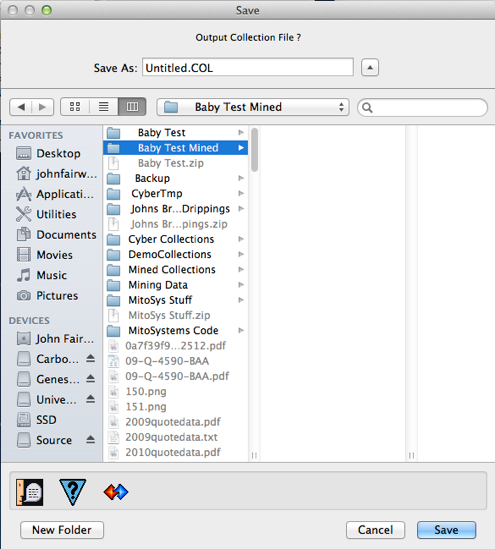 If the user chooses to save the collection to disk, they are prompted with a file put dialog as shown to the left. The initial name of the output file is set to “Untitled.COL” but the user should edit to change the name and location as desired (while preserving the .COL extension which is a Mitopia® convention for collection files). Note that despite the fact that a whole set of separate source files were mined in this case, the data extracted has all been merged into a single output collection which can be saved. In this case the output collection is well over 30MB in size.
These files can later be re-loaded and persisted using the “MitoMine – Instantiate Collection…” tool in the Administration window.
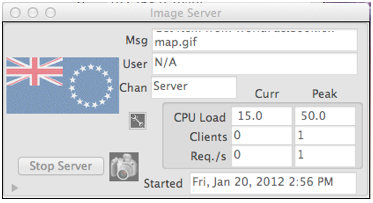
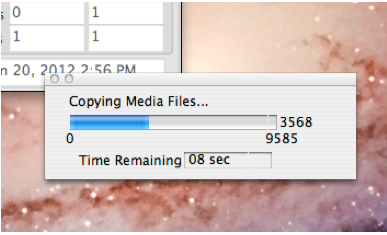
If on the other hand the user chooses “YES” instead of “Save to File” in the previous dialog, the resulting collection is persisted to Mitopia’s servers. If there are multimedia (e.g., Image, Movie, etc.) files that have been extracted as part of the mining run, the system may first display a progress bar similar to that shown above as it moves these files over to the appropriate multimedia server’s ‘Pending’ folder (see here for details). Then the process of persisting the collection in the servers begins. If you are running the servers locally (which is recommended during development), you may see the multimedia server windows updating with the preview images associated with multimedia data. The screen shot to the right shows the Image server ‘IMAG’ as it processes the flags, maps, and other images extracted from the WFB.
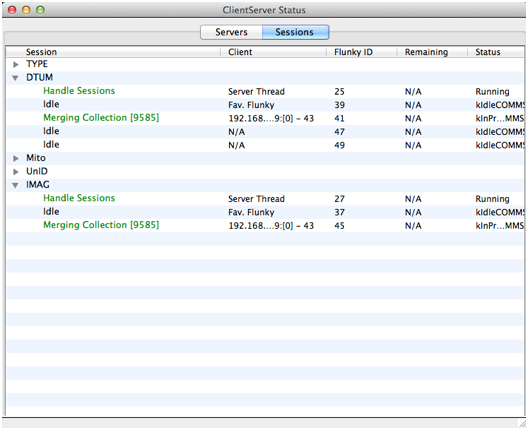 You can check the progress of the persisting process using the ClientServer Status window as shown in the screen shot above. This shows that the collection has been sent both to the Datum server (‘DTUM’) and the Image server since both are involved with persisting a subset of the records extracted from the collection (see here for details).
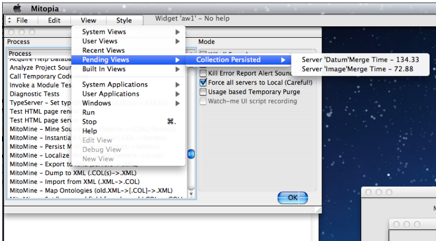
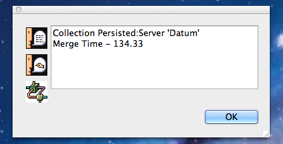 As each server (local or otherwise) completes persisting of the collection, you will hear Mitopia announce this fact by speaking the content of the notifications that result which also appear within the “View” menu as shown in the screen shot to the left. You may if you wish choose this item in the view menu which displays a dialog similar to that shown to the right. This is the standard behavior of Mitopia’s notification system being used by the MitoMine™ tool in the Administration window to alert the user to when persisting of the collection is complete and it is possible to query persistent storage to find and examine the results. If you attempt to fetch records created during a mining run before the associated completion notification arrives, you may not be able to find them.
The sequence described in this section illustrates the most common way that most users will interact with the MitoMine™ facility, there are of course many other possible places where one might knowingly or otherwise encounter and use MitoMine™. Some of these are described in other posts. This brief overview of the running process is intended simply to allow us to examine various aspects of MitoMine™ in more detail in future posts with at least a context for how it fits into the larger Mitopia® environment.